I recently bought an Apollo Air-1. This is going to describe my process of setting it up and calibrating it. Apollo Automation is not really a business in the traditional sense, as far as I understand, this is a bunch of Home Assistant fans (so basically my friends) and they produce custom devices that then integrate with ESPHome. And somehow they are much better at this than I am. And by that, I mean, instead of having strange setups with cables lying around and no case whatsoever, they make compact devices with nice cases. Let’s face it, it is not as much fun as my tinkering, but works much better and looks a bit more pretty. But I’ll let you be the judge of it.
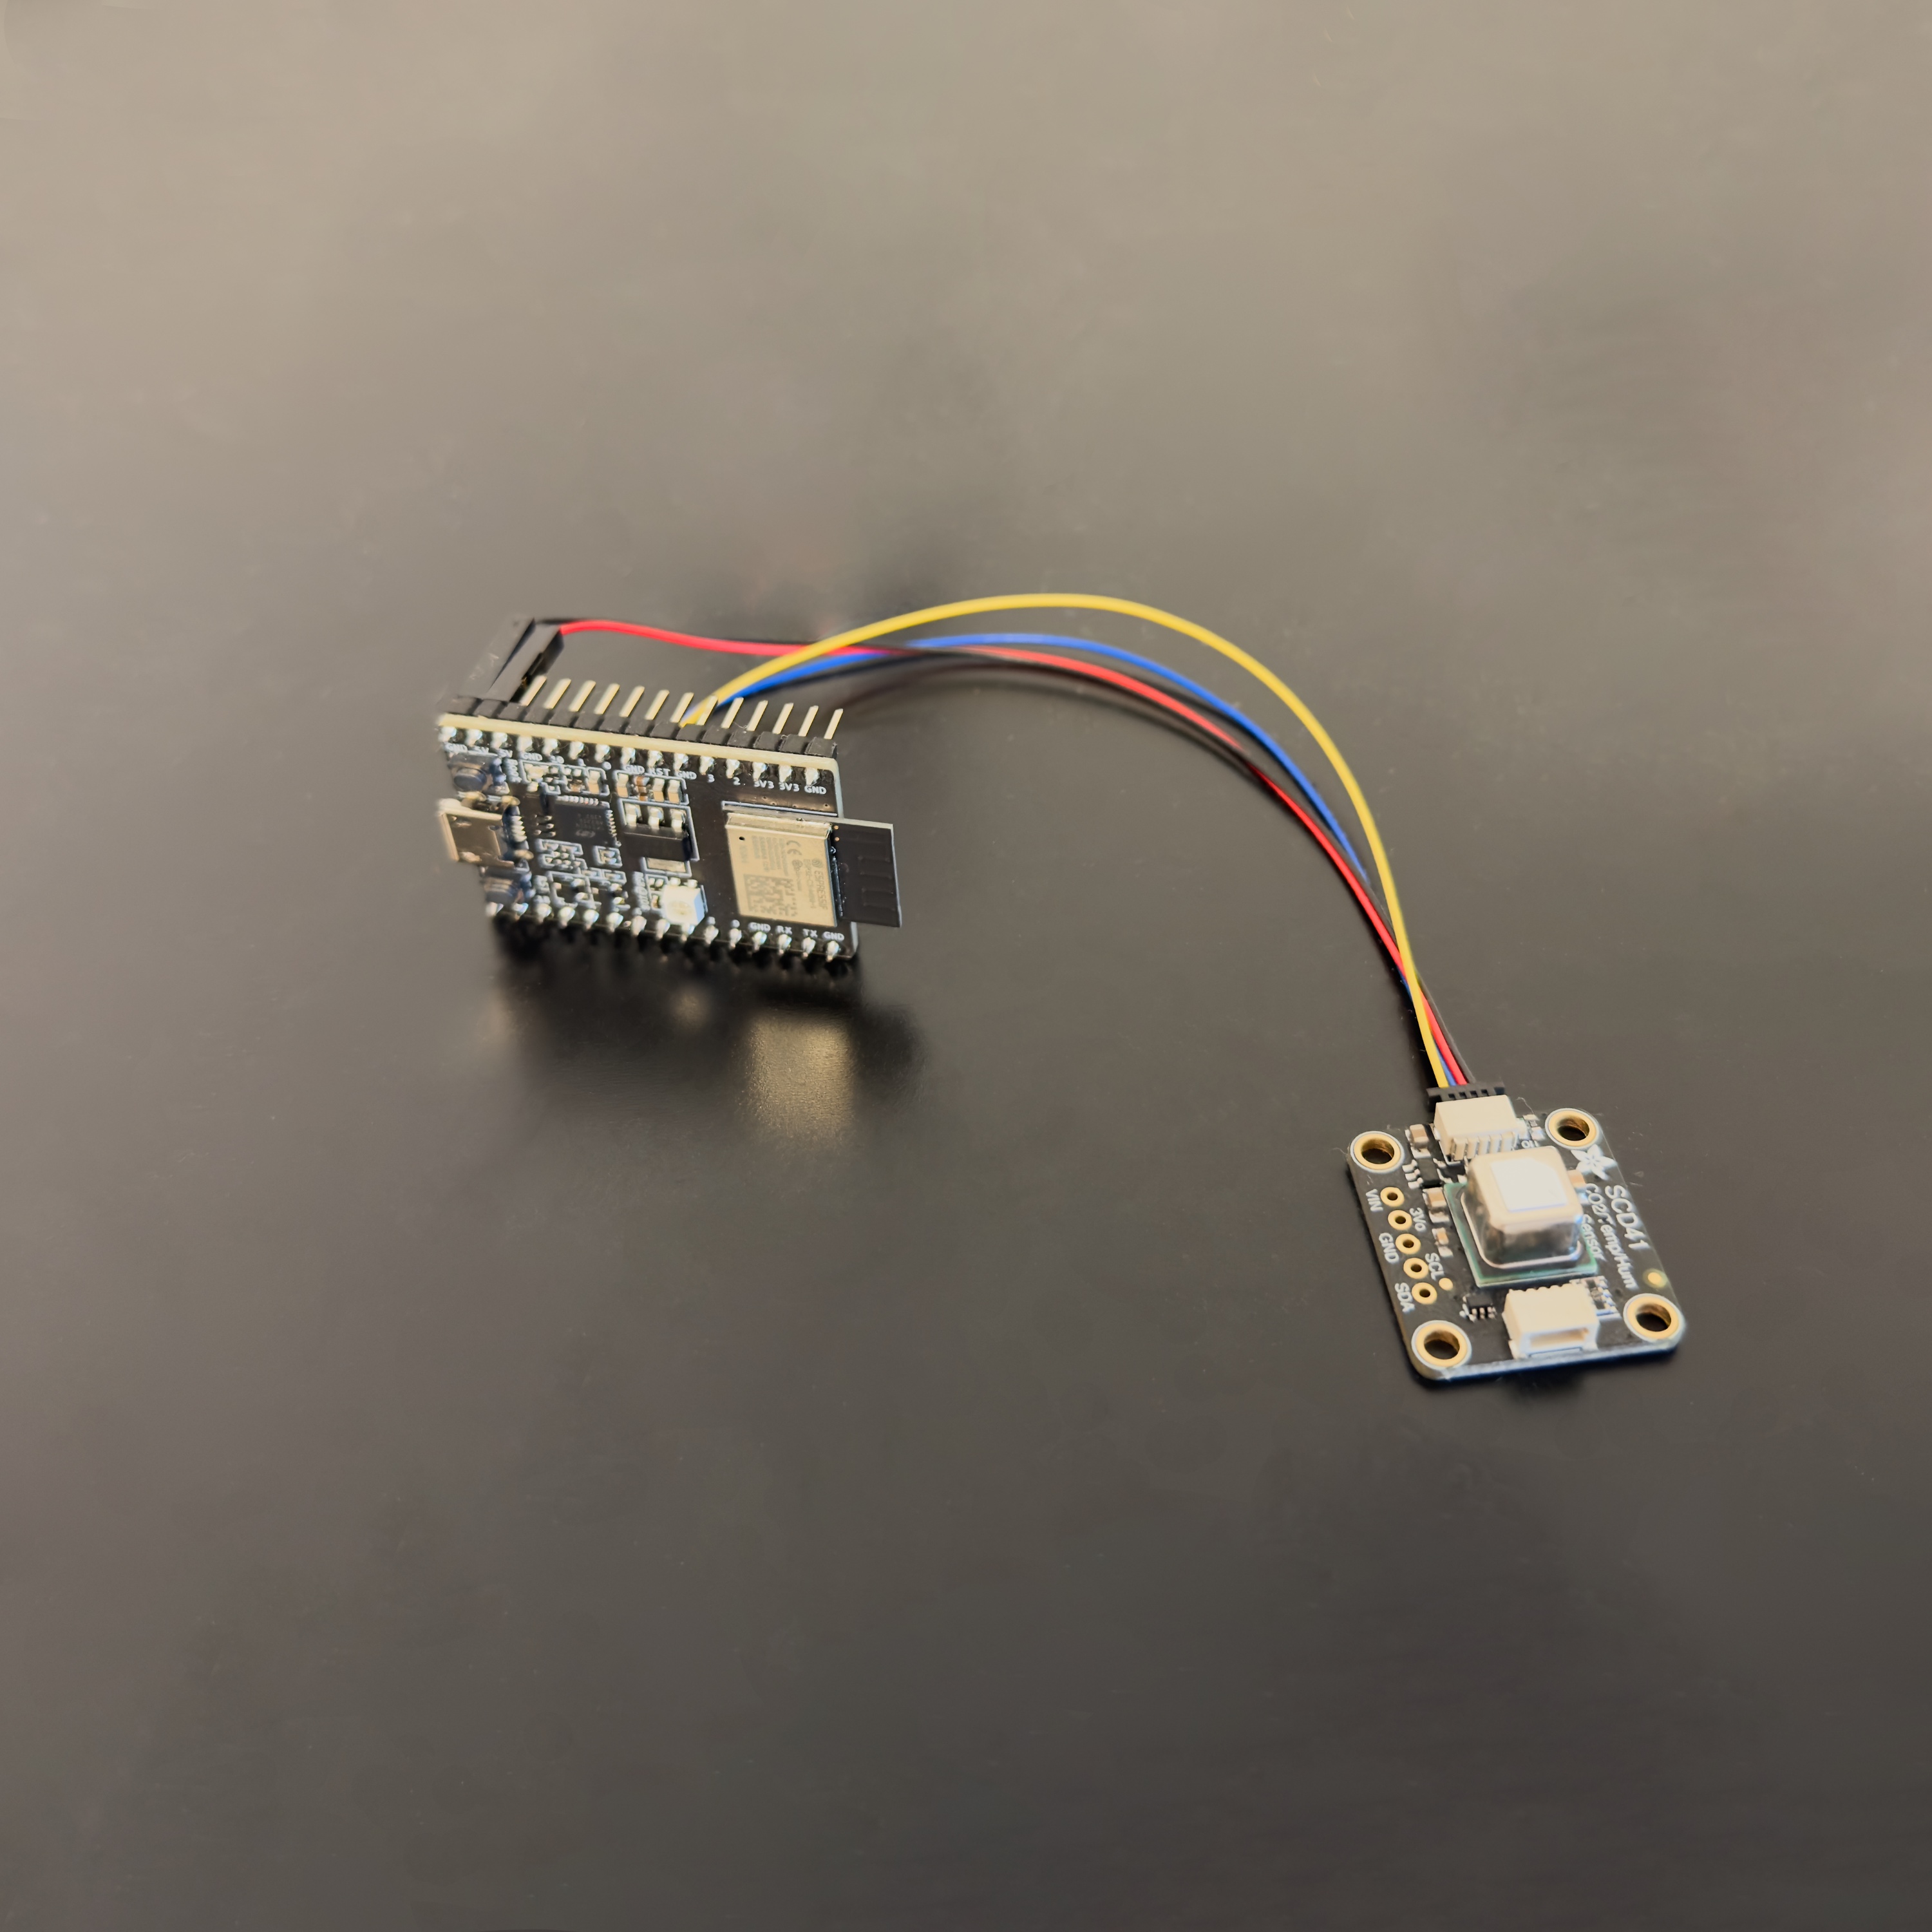
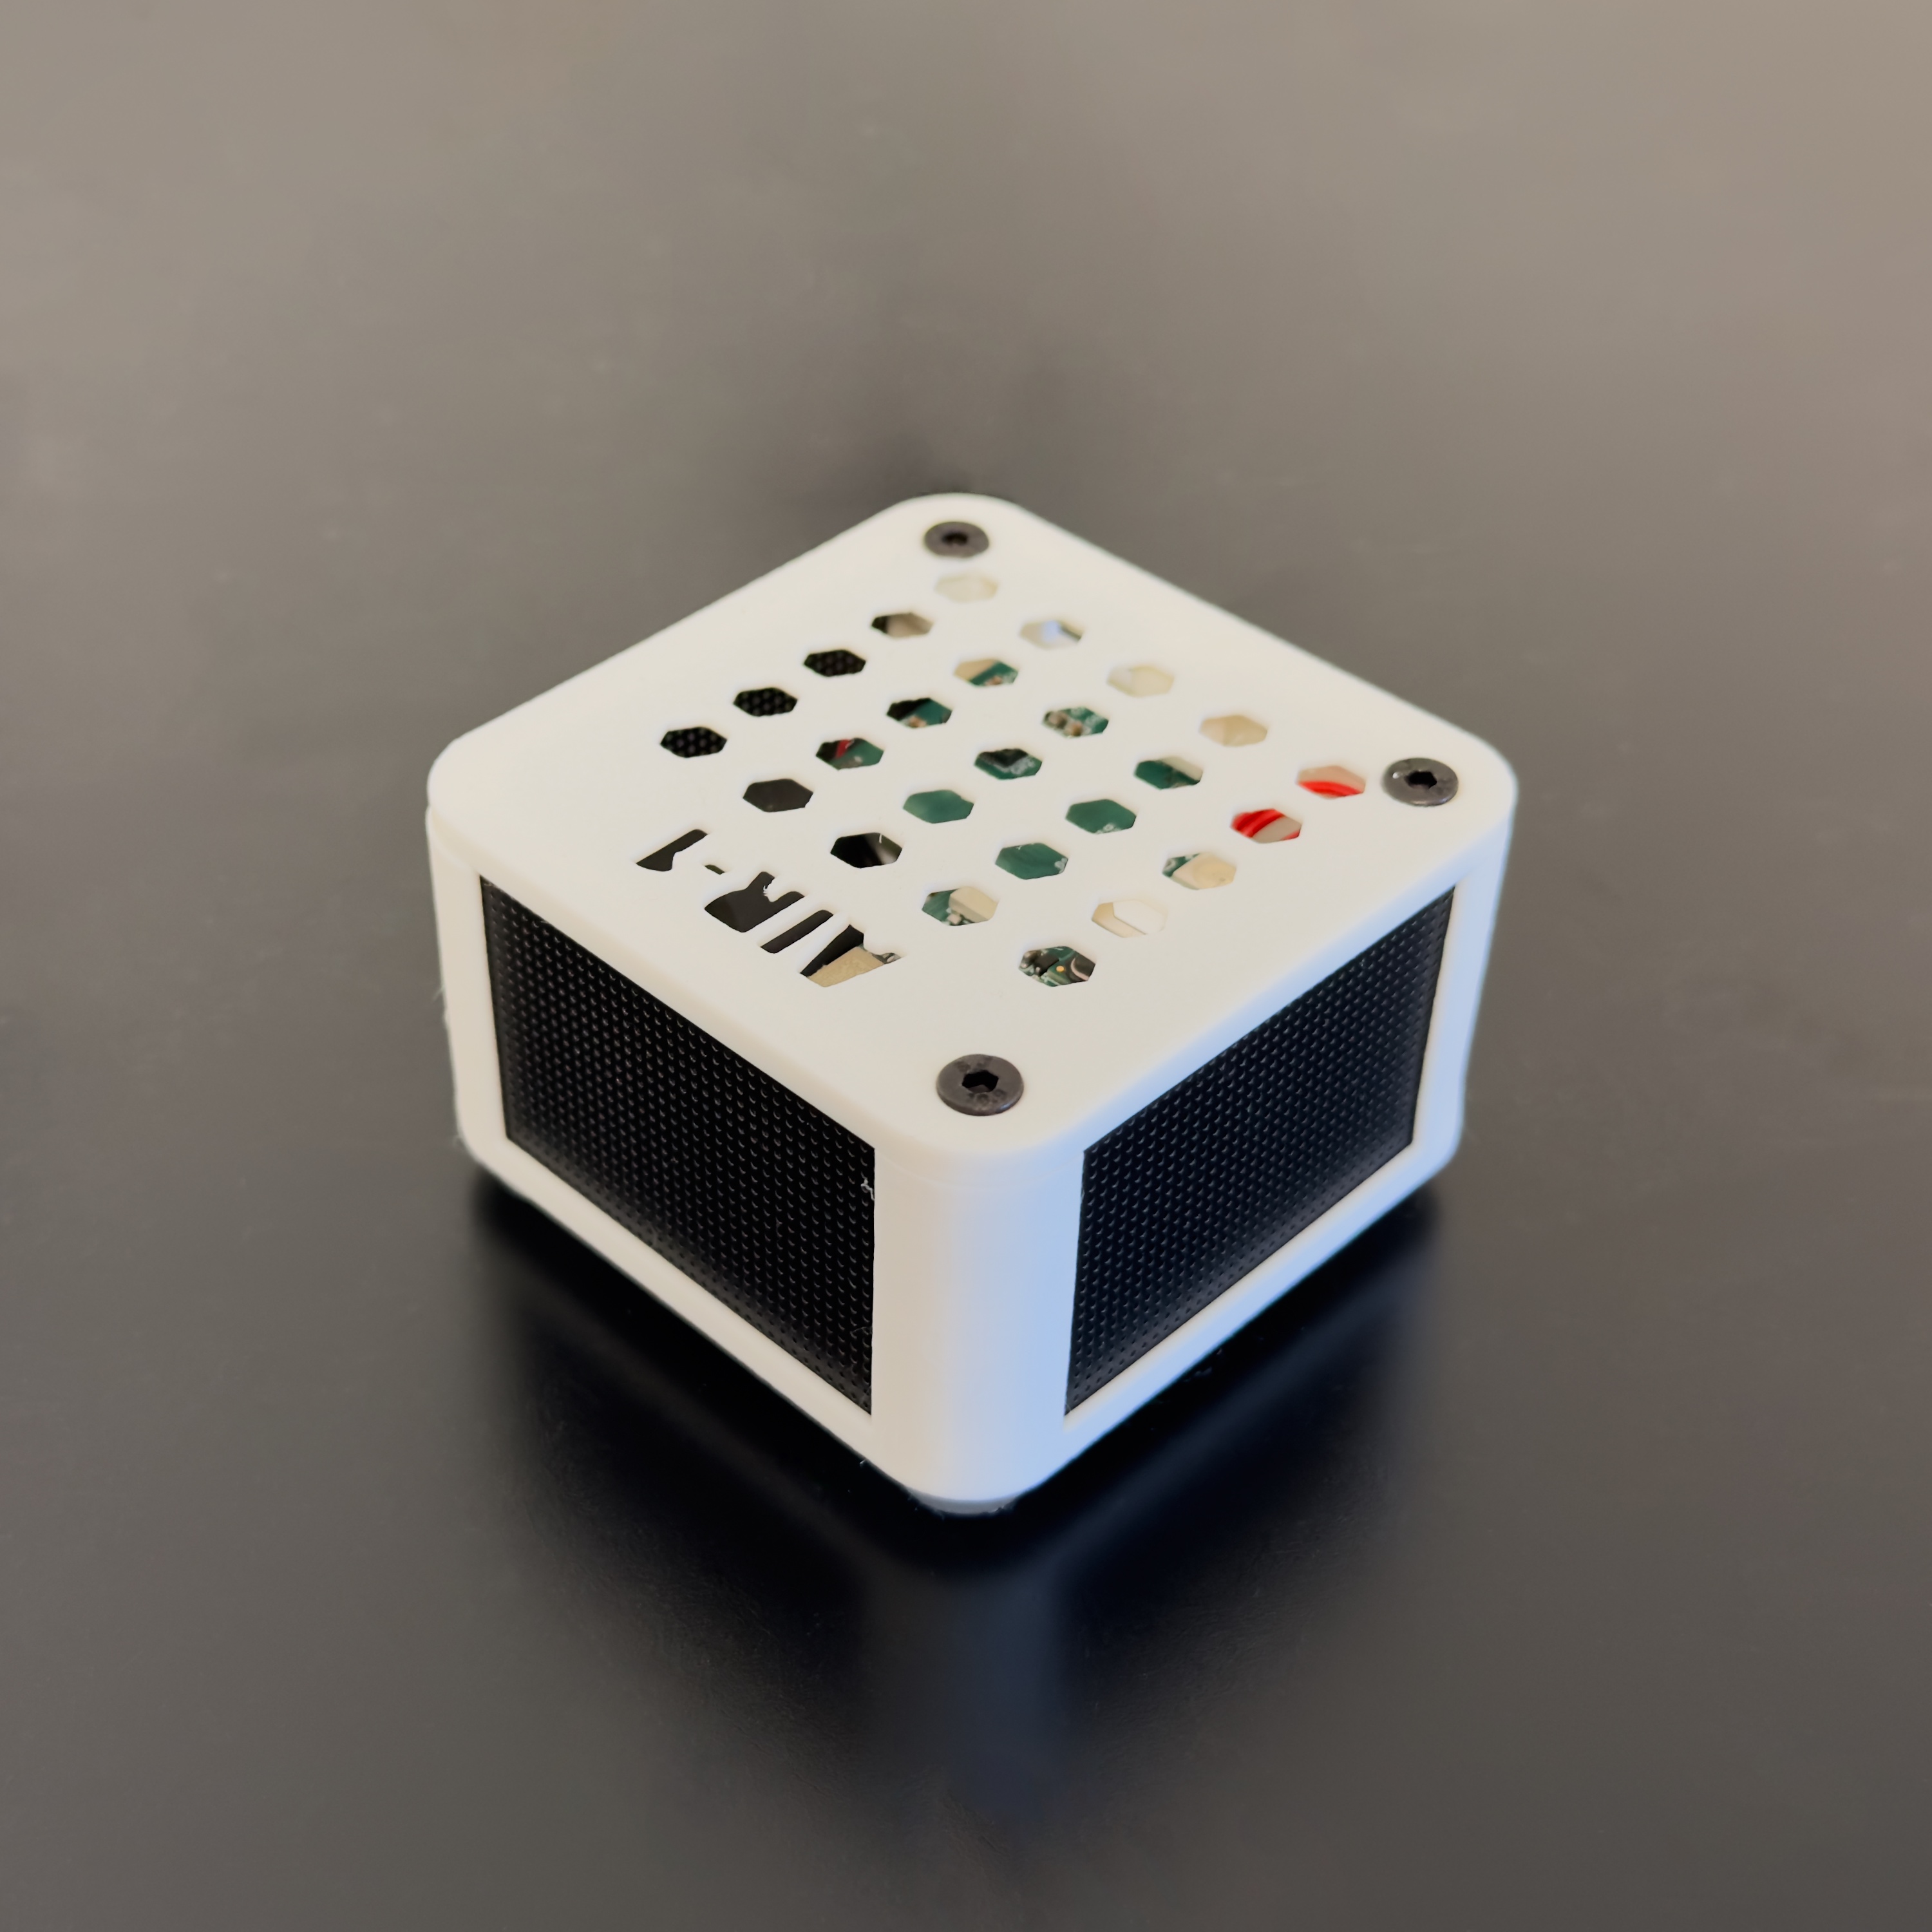
My old CO2 sensor (left) and my new Apollo Air-1 (right)
The Apollo Air-1 comes with quite an extensive documentation, which is always super helpful. And since I had used the SCD40 sensor before1, I also knew what I was getting into and new that it would need some kind of calibration. When I was using, I had auto calibration for the CO2. It worked quite well, but it was probably reporting values too low for me.
The problem with auto calibration
The datasheet from Sensirion describes the auto calibration as the following:
Automatic self-calibration (ASC) ensures the highest long-term stability of the SCD4x without the need of manual action steps from the user. The ASC algorithm assumes that the sensor is exposed to air with CO2 concentrations of 400 ppm at least once per week.
Now the problem with this is pretty simple and can be summed up best by the following figure:
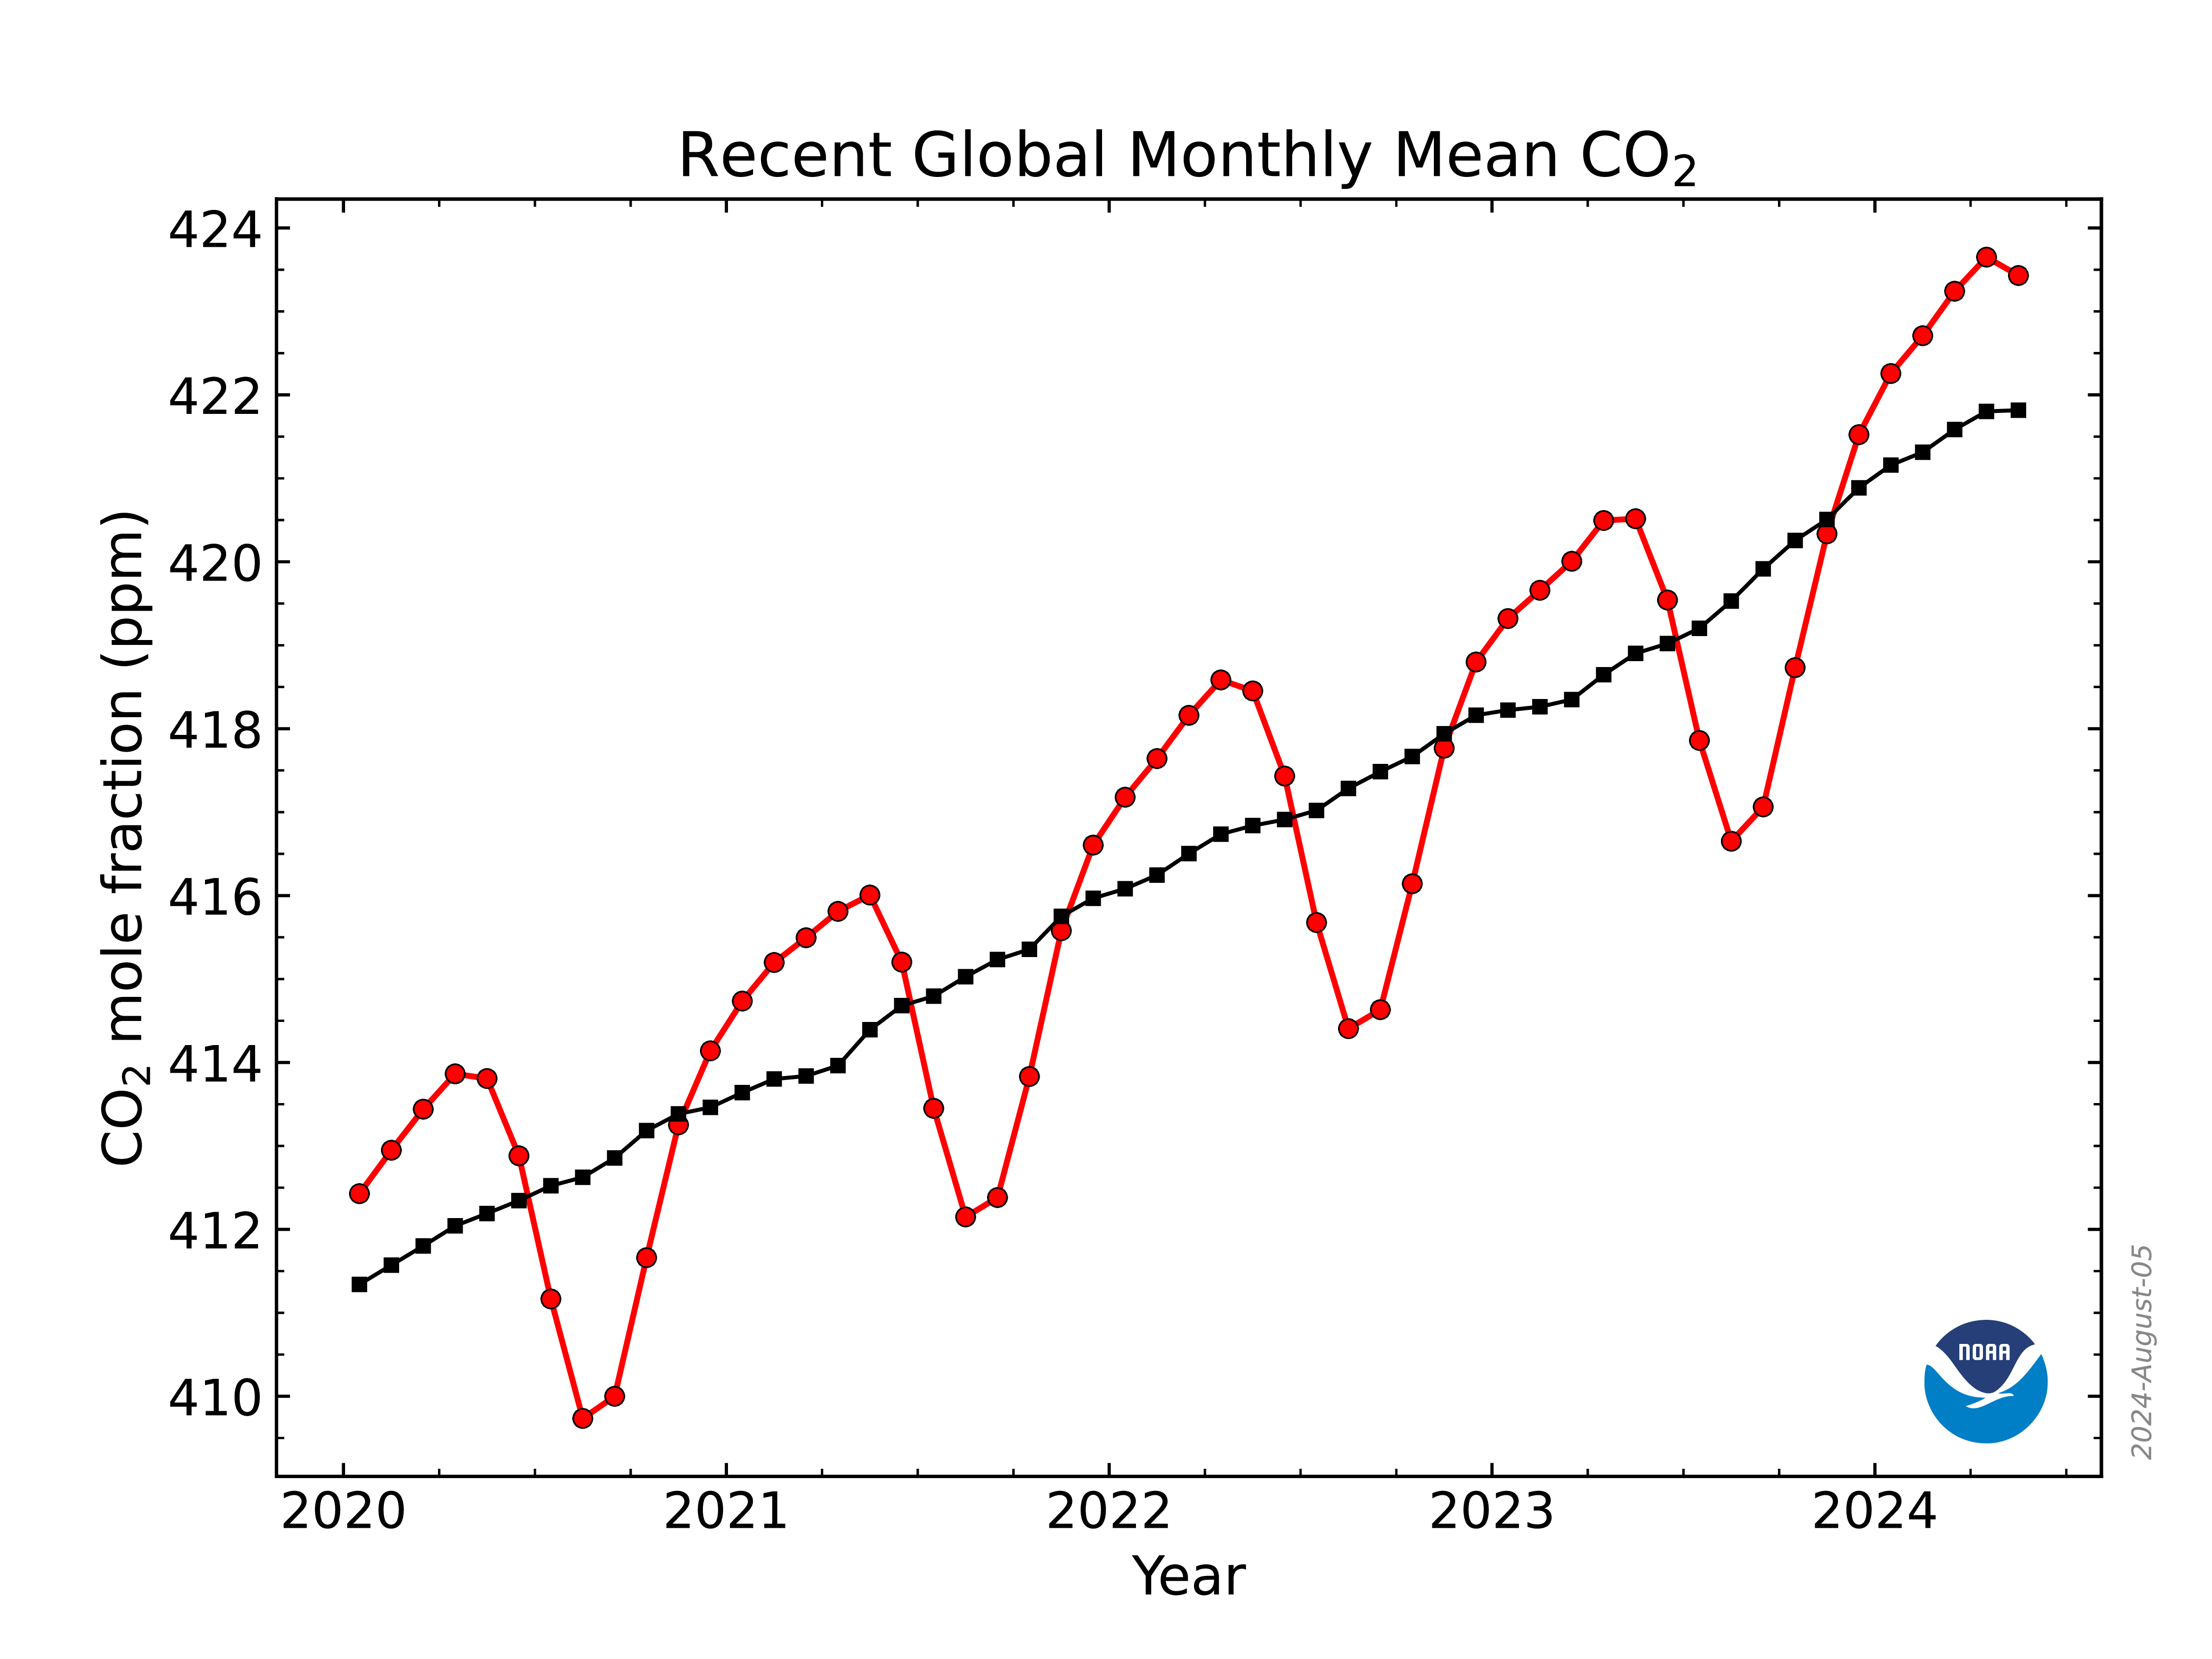
Global Monthly Mean CO2 from the National Ocean and Atmospheric Administration
The problem is2, that in our current environment one cannot reach the required 400 ppm to calibrate the sensor. It is simply not possible, as the atmosphere is up to 423 ppm and it only gets worse. And it gets worse at an alarming rate. As such, the automatic self-calibration to 400 ppm does simply not work. I assume this is why the Apollo Automation developers decided to build for a more manually process to calibrate the device.
Finally, the Apollo developers also mention that the temperature needs a bit of an input as well.
There is a temperature offset needed due to heat buildup from the ESP32-C3. We are still evaluating it but it is between 2 and 6 degrees C.
This makes sense as well, and I assume that the offset is a bit more different based on where the device is installed. More airflow will probably result in a lower offset, just as less airflow will most likely mean a larger offset as well.
So I was willing to try to calibrate the CO2, humidity and temperature measurements, I just wasn’t quite sure yet how. But I was super happy to do it.
Temperature and Humidity
I already had two devices report their temperature and humidity. One of these devices is the Sonoff SNZB-02D which stands on my desk and displays the temperature as well as the humidity3. Further, my Xiaomi air purifier also has a temperature and humidity reporting feature4, which appears to be more or less accurate. And now that I have discovered the fun of having some Matter over Thread devices, I might have to add an Eve Room device at some point (but oh my god they are so expensive)5.
So my idea was really straightforward. Compare the temperature and humidity to the average of the existing devices, and I’ll probably get a match that is close enough. Or so I, though. I quickly built a calculated sensor in home assistant to track the difference between the average temperature of all the sensors and the Air-1.
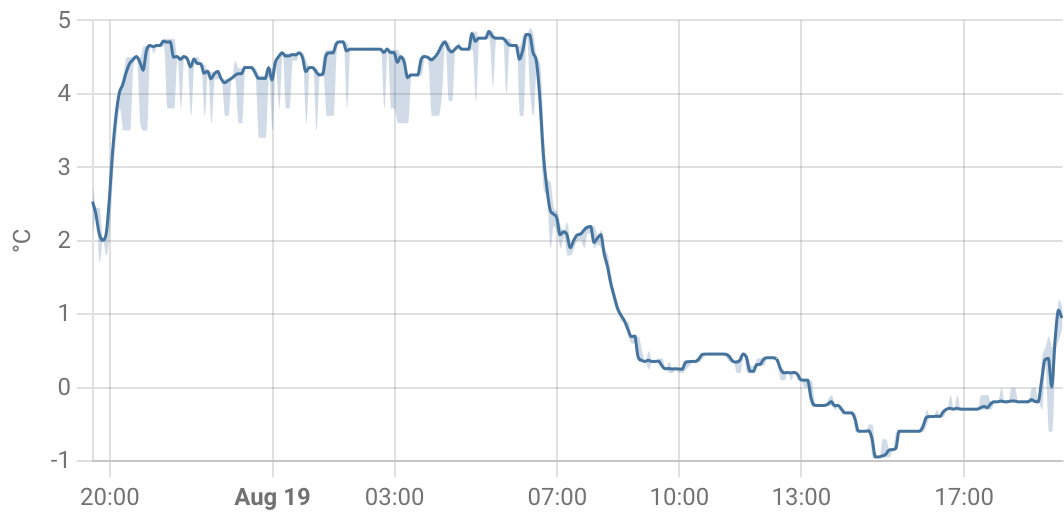
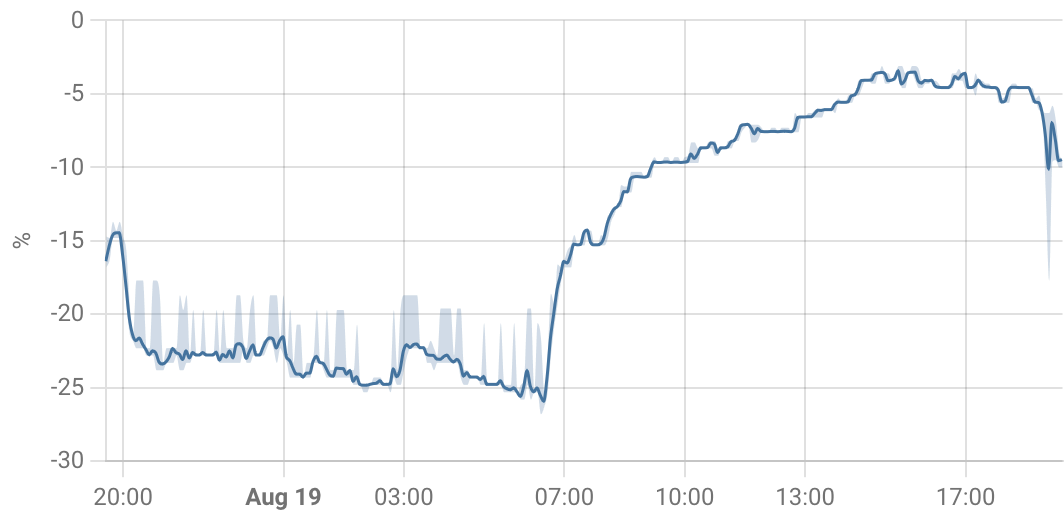
Difference in temperature (left) and humidity (right)
Over the span of 24 hours, I measured a temperature offset from almost +5 °C to -1 °C. The same with the humidity, which was -25% to -5%. These were obviously considerable differences, and it was not really helpful to calibrate the Air-1 values. There also doesn’t appear to be much of a pattern too it. I assume it’s that the sensors are too far apart. Both the sensors which I average out are quite close to the window, where they are exposed to sun (which warms them up) and to fresh air (which cools them down). The Air-1, on the other hand, is on the other edge of the room and more coverage from the elements, so that was not really all the useful.
The next step was effortlessly decided. I need to get some devices to measure the temperature in my apartment. So I ordered a few more SZNB-02P and I placed on of these devices next to the AIR-1. And of course, I updated the diff calculation to use the sensor that is laying right next to the Air-1.
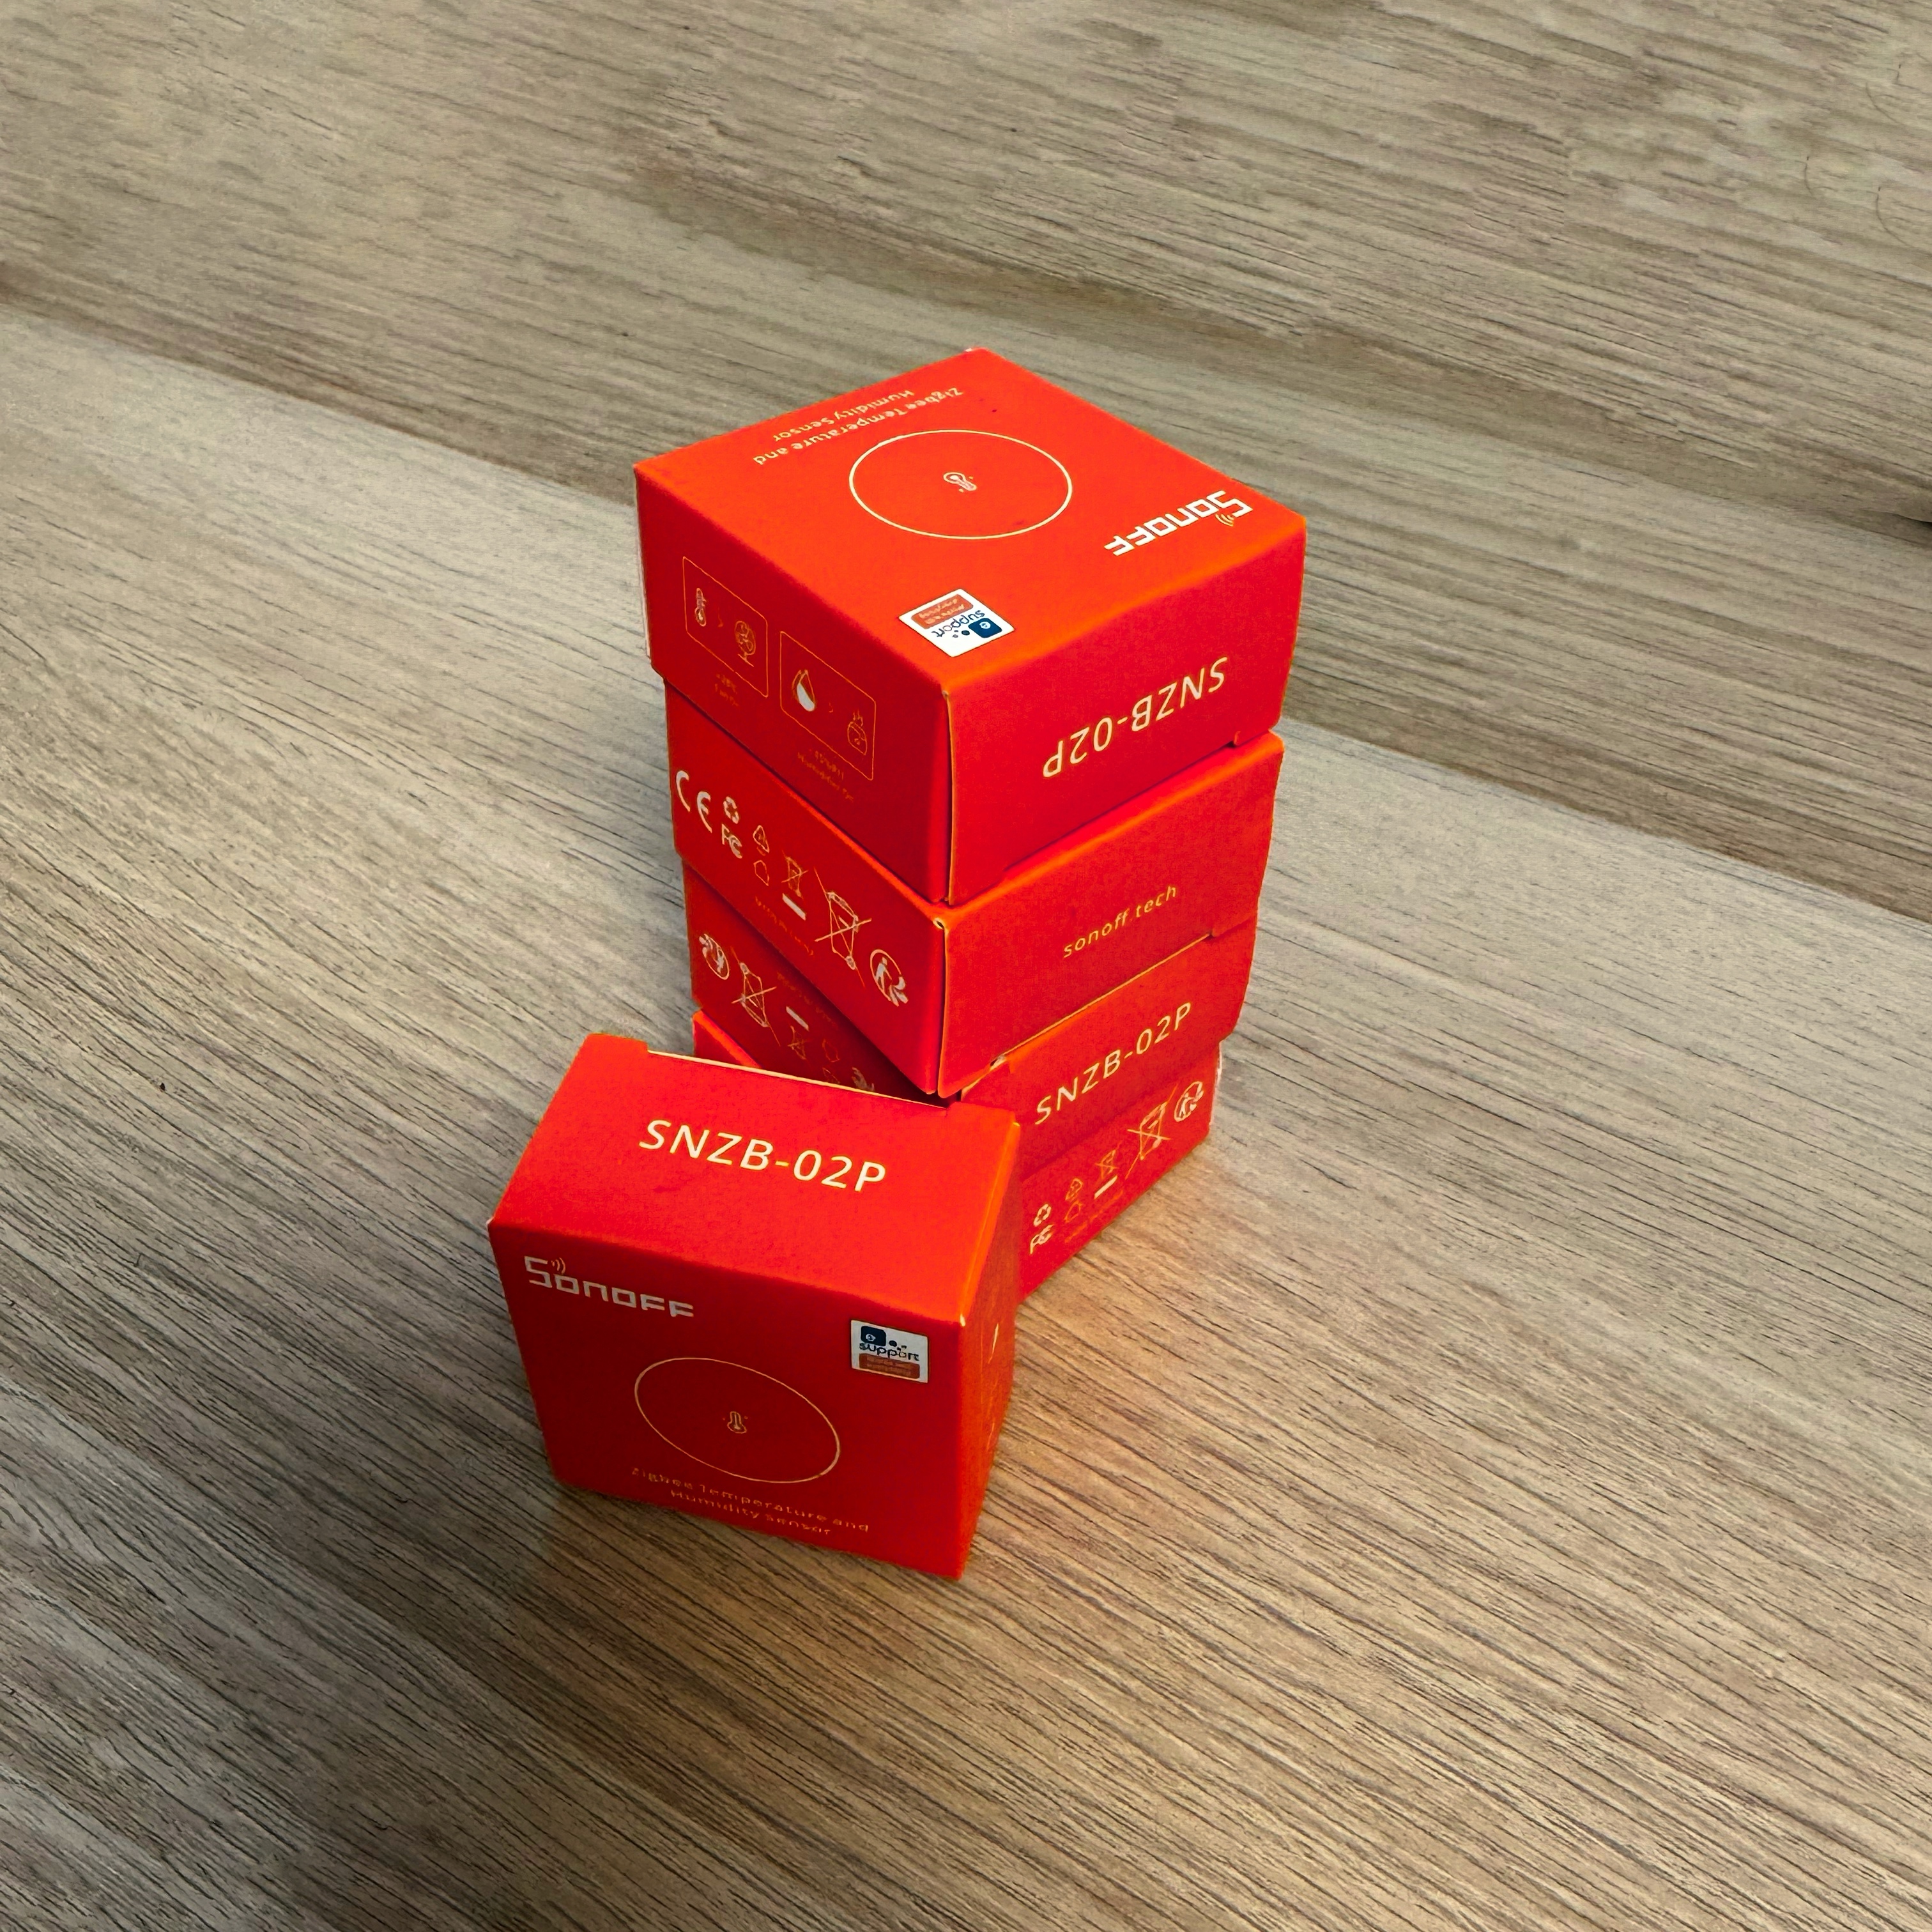
A stack of new Sonoff SNZB-02P
Now that I had my sensor stack, I set up the AIR-1 as well as two of the Sonoff sensors next to each other in the following way:
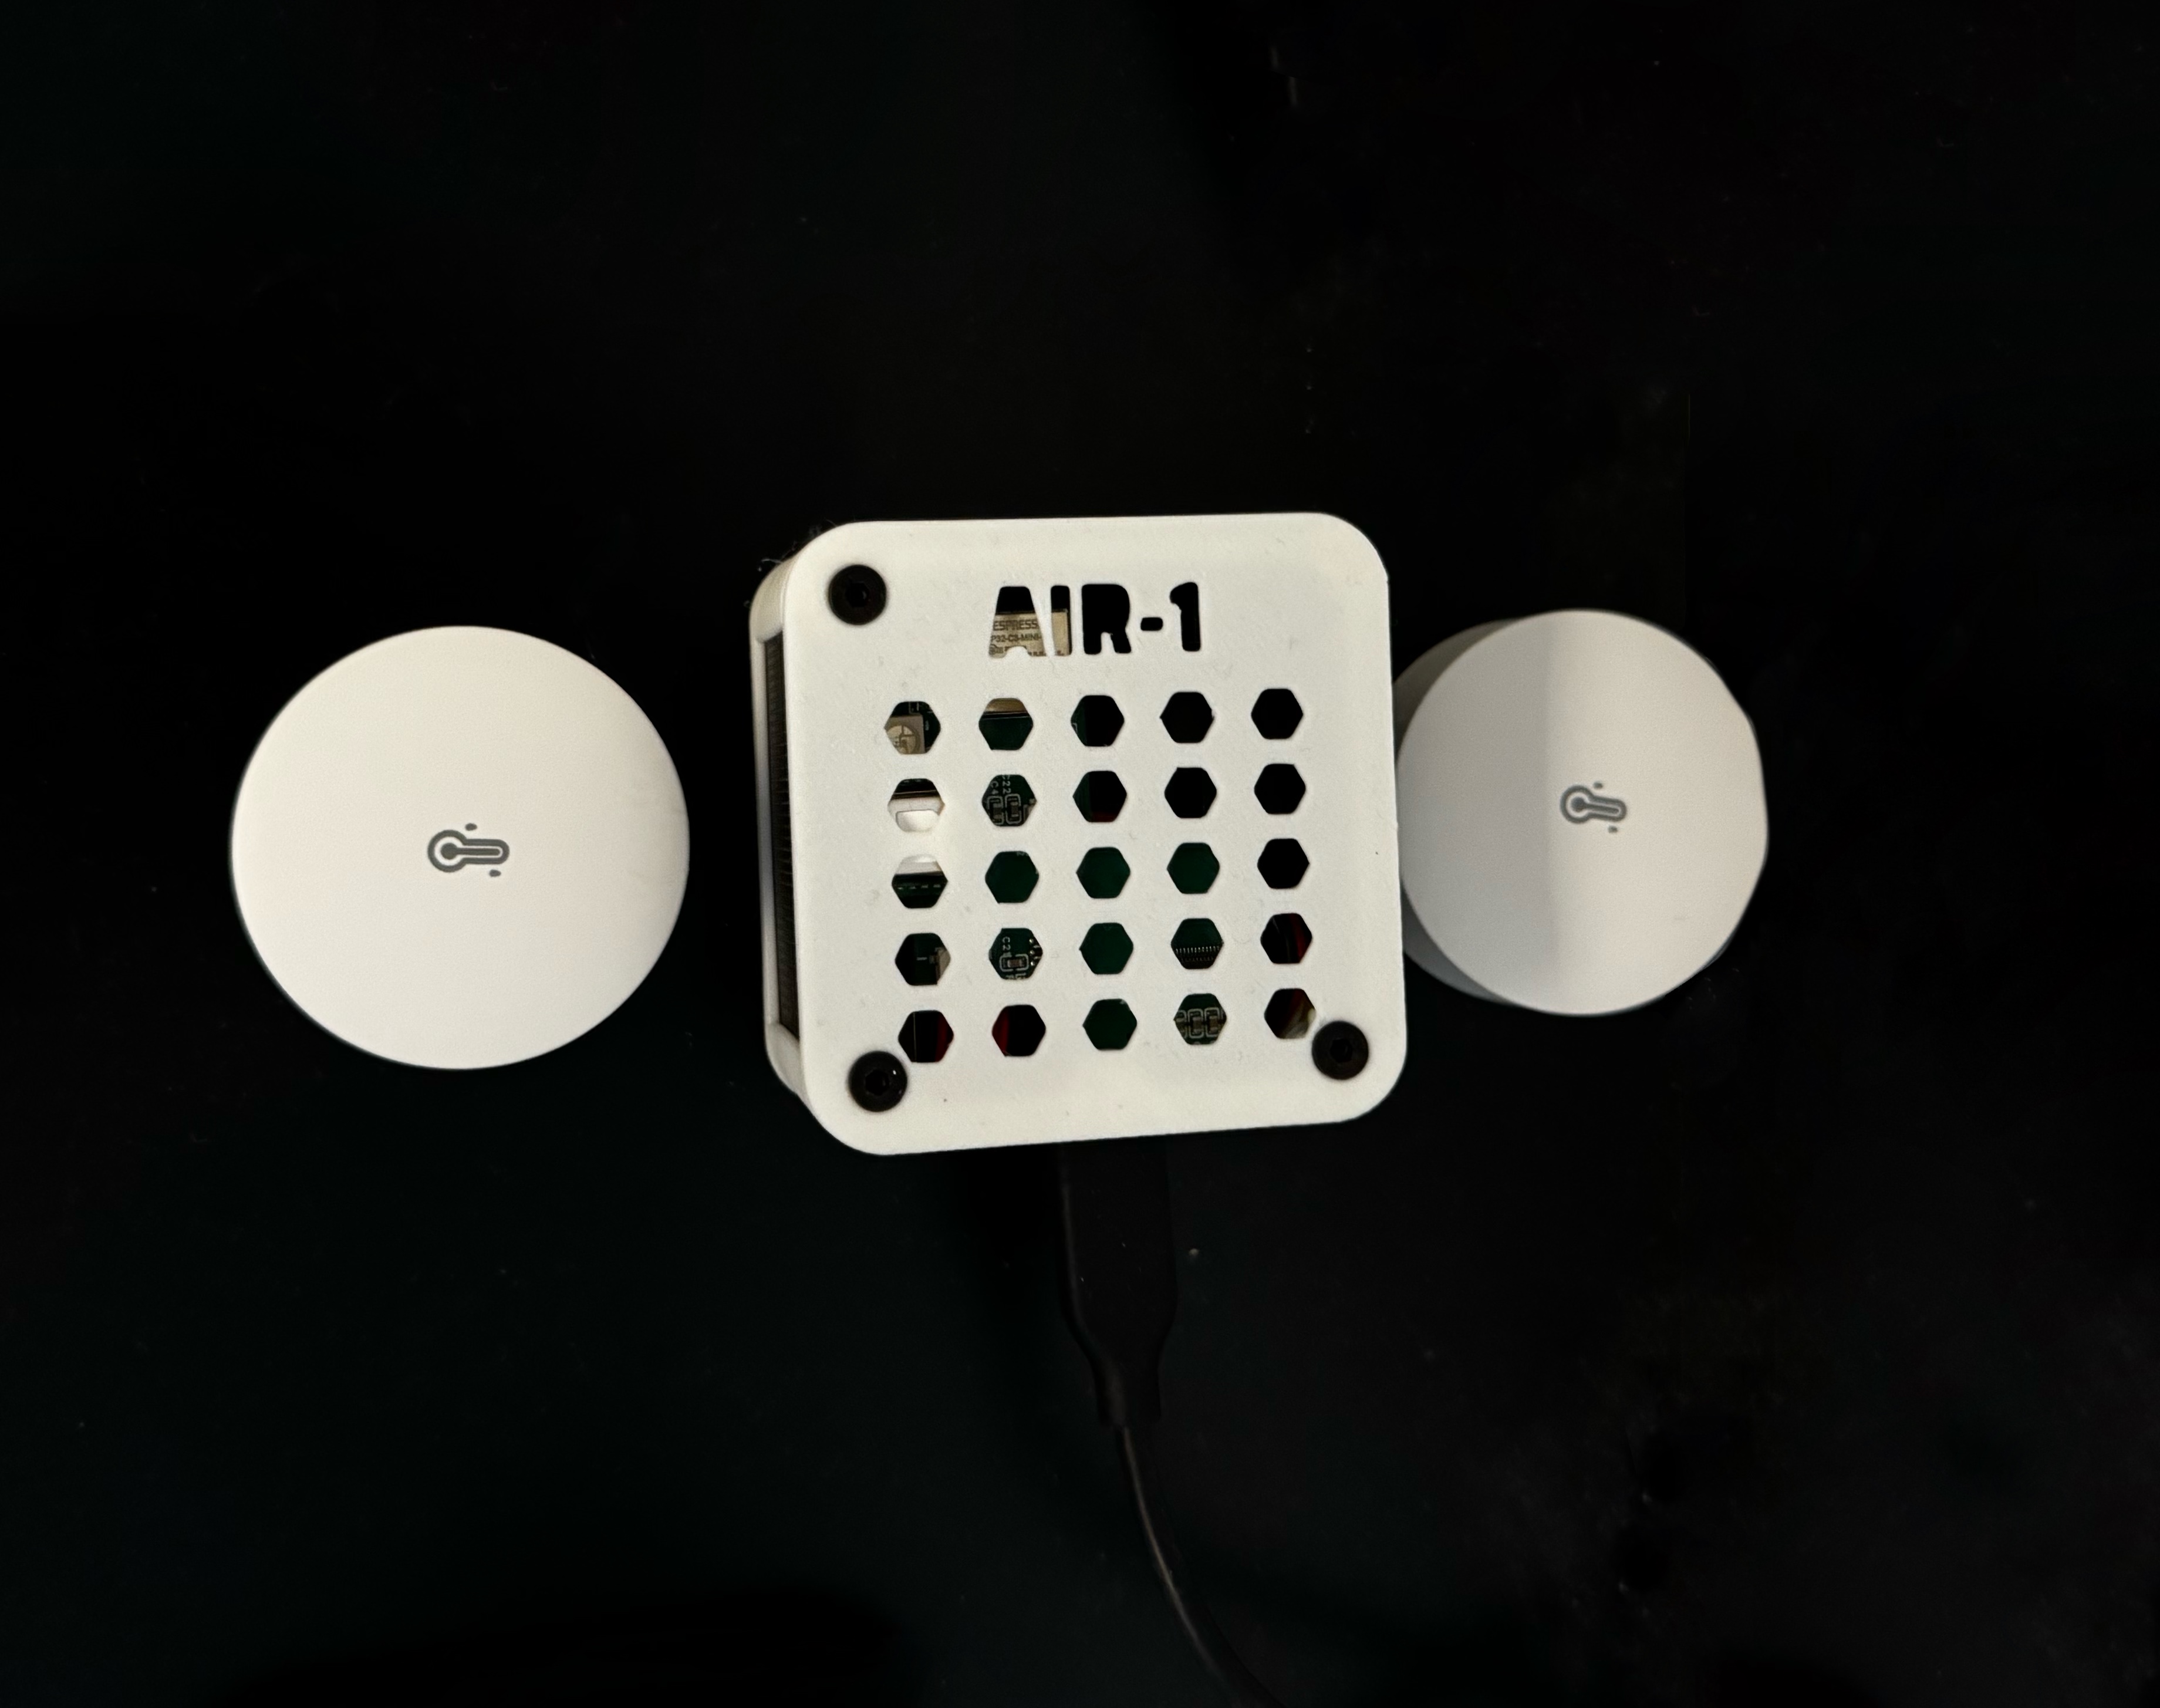
Using this setup, I was letting it run a bit, so I was able to take the average values of the two sensors and compare them to the AIR-1 reported values.
And the results were quite surprising. Of course there was some offset6 as expected, but I figured this worked pretty well.
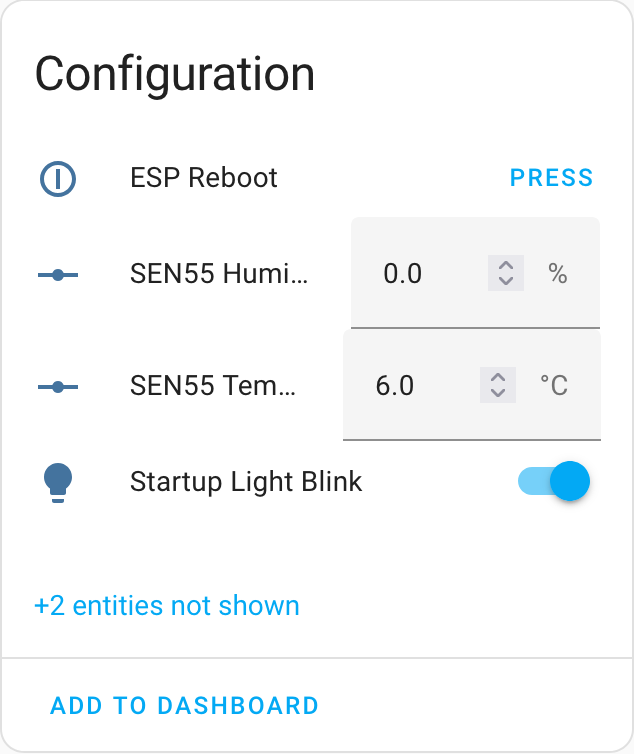
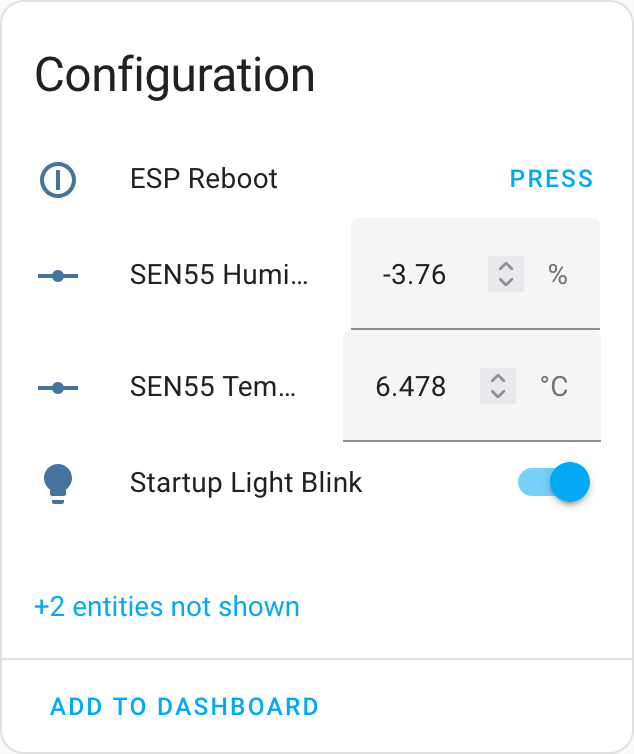
Using the analysis over 3 weeks, which includes a change from warmer weather to colder temperatures, I overlaid the curves and calculated the average difference between the Sonoff sensors and the Air-1. This gave me for the temperature an additional offset of 0.487 °C (added to the 6 °C already configured on the device by default) and the humidity was off by a bit more, namely -3.76 percentage points.


So using the built-in configuration, which is straightforward to use in the Home Assistant interface, I updated the offset values to my new values as calculated through the other sensors. While I’m not sure as much about the temperature, as this could potentially also depend on the temperature of the ESP32 chip, the humidity was really off by quite a bit. So I’m glad I calibrated this and should have a more accurate or at least more consistent measurement.
So now for the temperature and humidity, there are just two things left over that I need to do.
First I removed the two Sonoff sensors and I will find a better place to put them. I think there certainly is a place for another sensor in my bedroom, but I might potentially also add another in the living room or kitchen. I’m still a bit unhappy with the Ikea Vindstyrka only reporting entire degrees, so I might add another sensor there so I can average them out.
Secondly, I also needed to add the AIR-1 to the average for the room, which was super easy to do via the Home Assistant virtual sensor I had created for this.
So that was it for the temperature and humidity, but those two values were not really which I bought the Air-1 in the first place.
CO2
For the CO2 calibration, I decided not to go with the auto-calibration, mostly for the reason outlined above that I think it’s a bit problematic with the 400ppm set fixed, which is simply not accurate anymore. And while I do get enough air into my bedroom, I do also live in a big city, so I’m not entirely sure if we ever get the natural minimum, with all the cars and heating systems and whatnot.
So I decided to calibrate it the old school way. I went outside on the balcony and pressed the calibrate button on the Home Assistant interface. And that was it, simple as that.
And as I had seen, the sensor came pre-calibrated. While there is no indicator what the current offset is or what it is calibrated to, it appeared, at least to my eyes, that almost no change happened with the calibration. Which I guess is a good sign, that means that the device was calibrated when I received it and the calibration seems to stick.
Now if the world could just figure out how to emit way less CO2, so that the natural background value is not steadily going up, that would be good for my sensor and great for the world.
I didn’t use a SCD40, as is built into the Air-1, but rather an SCD41. They are very comparable, except the SCD41 is a bit more accurate and has an extended measurement range. ↩︎
The larger problem is this: We are burning fossil fuels at an alarm rate, and we are destroying our environment for the long term. The world appears to be incompetent or unable to take the necessary actions to address the worldwide climate emergency. ↩︎
Somehow the display updates quite fast, but sporadically the reporting via Zigbee is annoyingly slow. For example, if I open the window, the temperature will drop on the display before the value changes in Home Assistant as well. And it only seems to display and report the temperature in 0.2 steps (and to my specific annoying only). ↩︎
The devices work in Home Assistant via local polling. And somehow it drops out every so often, which is a bit of a shame. ↩︎
I do also have a HomePod mini that measures temperature and humidity, but first I highly doubt the accuracy, and it doesn’t report the value to Home Assistant in any useful way. ↩︎
Of course the Sonoff sensors are also not perfect, but they are using the Sensirion SHT40 sensor which is supposed to be quite precise. But just to be certain, I also tracked the difference between the two Sonoff sensors, which were about 5 cm apart, with only the AIR-1 sitting in between.
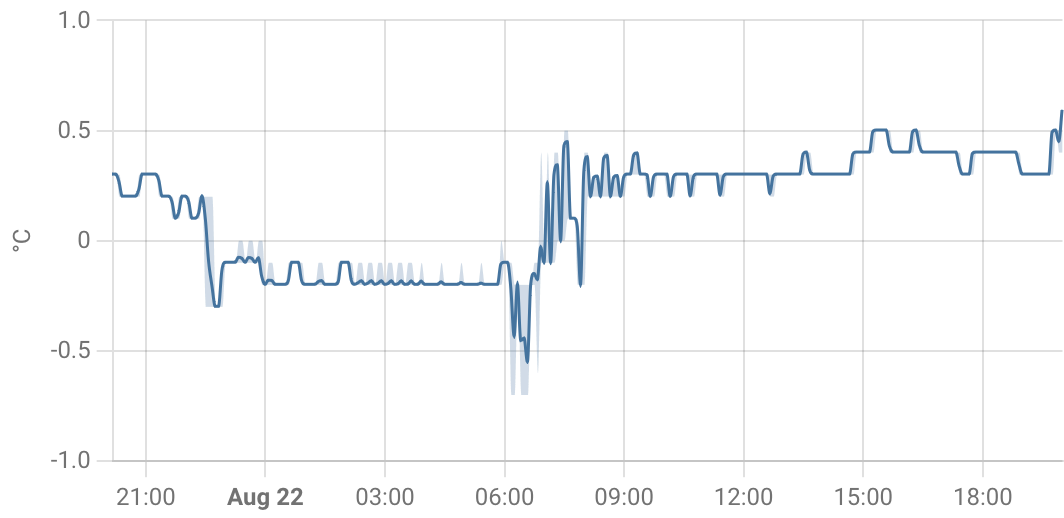
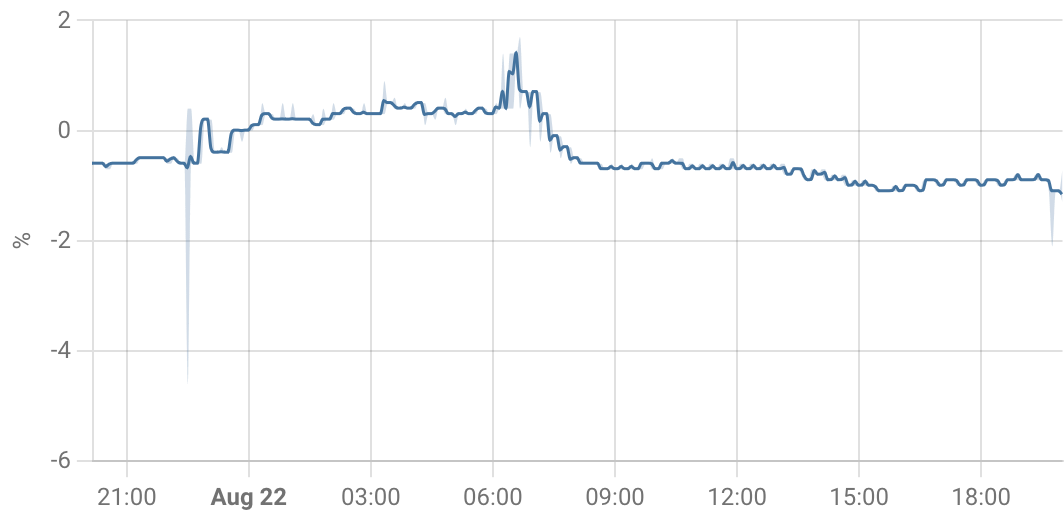
Difference between the Sonoff sensors, temperature (left) and humidity (right) The relative humidity is well in the given range of the ±2 % in relative humidity, but the temperature is a bit above ±0.2 °C. But one of them is right up to a wall, so that wall might store and radiate some temperature as well. And they do both have a device in between. ↩︎